Before you start
Use a staging store with WooCommerce and a working checkout page. Install the Cartdini Free ZIP through Plugins → Add New → Upload Plugin, then activate it. This is a release candidate; review the tested environments and compatibility limits first.
You do not need Pro for an always-visible text, select or checkbox field in either checkout, or for textarea, email or telephone inputs in Classic. A simple delivery instruction also does not require a separate payment or shipping integration.
Create a delivery-instructions field
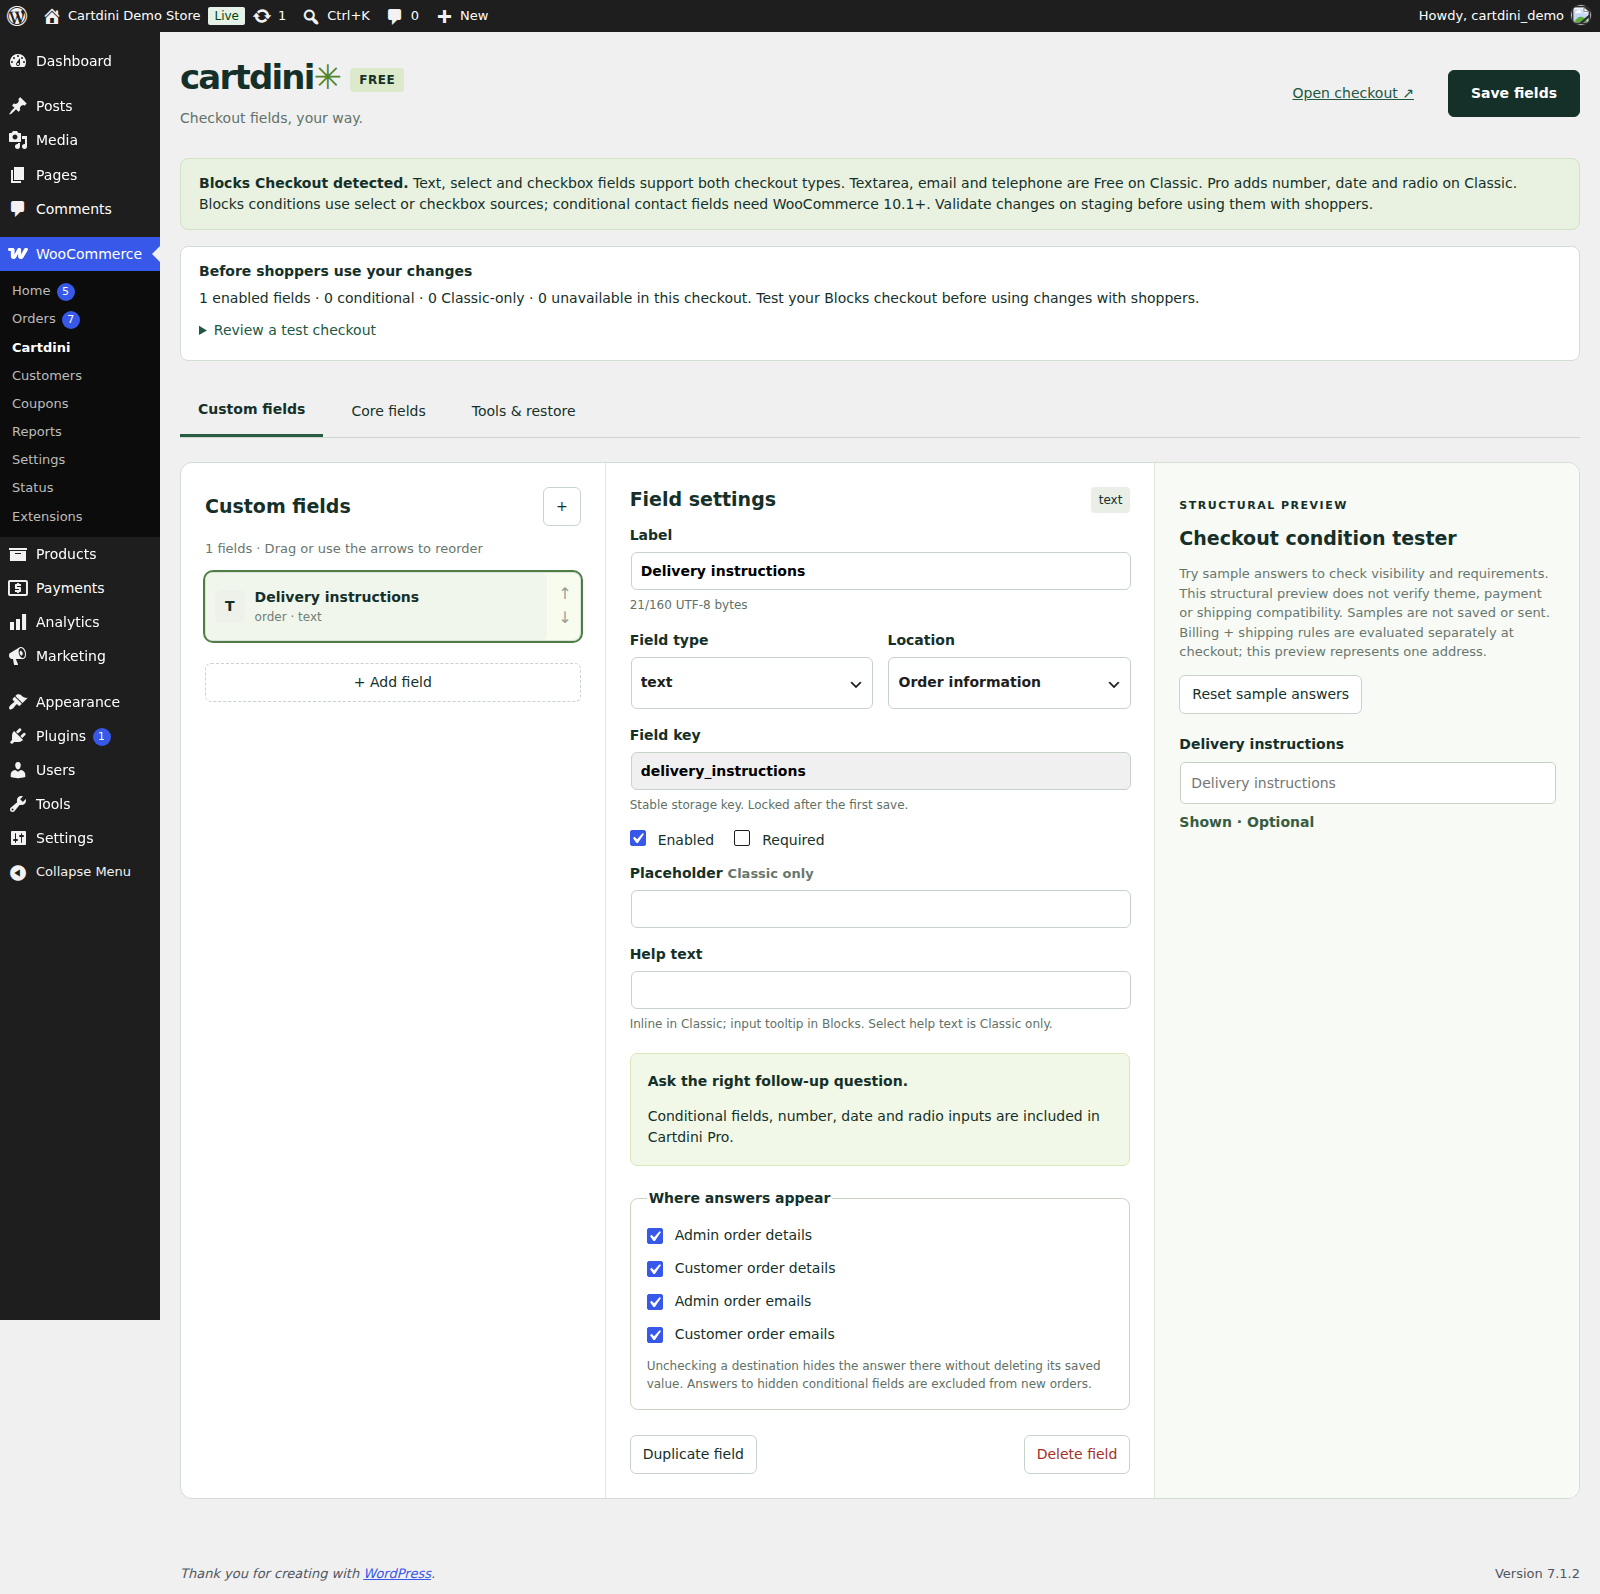
- Open WooCommerce → Cartdini and choose Add field.
- Set the label to Delivery instructions and choose the Text field type.
- Choose Order information so the answer belongs to the order, rather than to each address.
- Keep the field enabled and leave Required off. A customer with no special instructions should be able to continue.
- Choose a permanent key such as
delivery_instructionsbefore the first save. The key locks after saving; the visible label can still change. - Save the configuration. Open the actual checkout page on your staging store.
Check the answer reaches the order
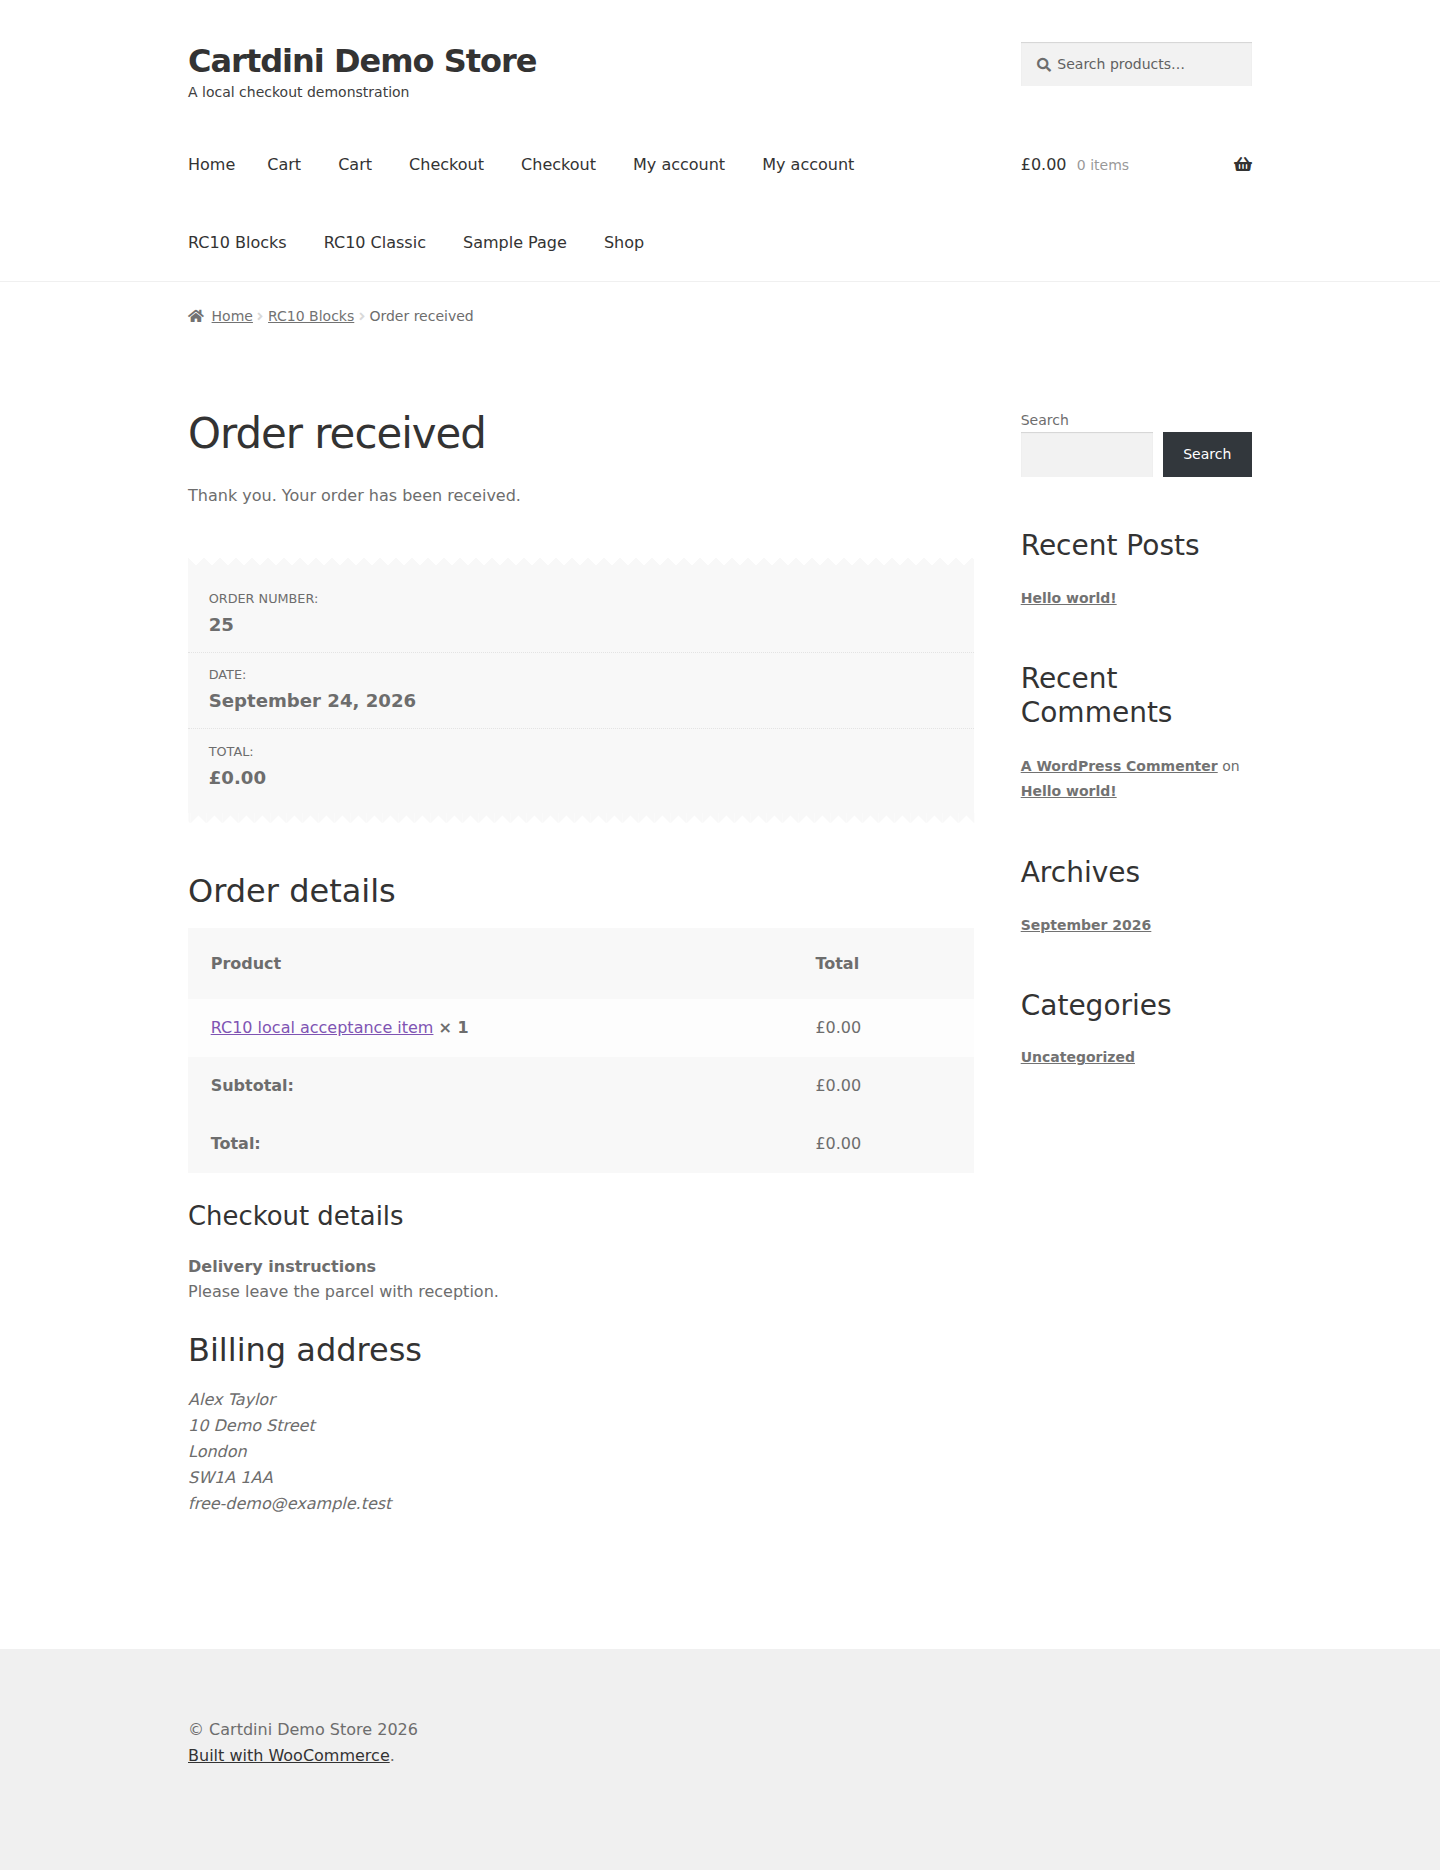
Place one test order with “Leave with reception” and another with the field empty. Both should succeed while the field is optional. Open WooCommerce → Orders, select the test order and find the saved answer in its details. Check the corresponding order email output too. Free’s Where answers appear controls select admin order details, customer order details, admin emails and customer emails independently. All four default to on; hiding a destination keeps the saved answer.
If you make a field required later, repeat the test with an empty answer and a filled answer. A required question should block submission only when it is applicable. Never use a checkout field to collect passwords, card details or information your store does not need.
For billing + shipping fields, test both addresses. That location holds separate values for each address; it is different from one order-level delivery instruction.
Need a fixed list of answers instead?
Use a select field when customers should choose from a defined set. Enter one choice per line with a stable value and a readable label:
door | Leave at the door
reception | Leave with reception
customer | Hand to the customer
The plugin validates submitted options against the configured list. This records a preference; it does not add a shipping method or guarantee that a carrier can follow it.
If the field does not appear
- Confirm the configuration was saved and the field is enabled.
- Check you are editing the checkout page your store actually uses.
- In Blocks, confirm the field uses text, select or checkbox and a supported location. Free’s textarea/email/telephone and Pro’s number/date/radio types are Classic-only.
- Clear any cached checkout page and test on staging with other checkout customizations disabled individually.
For a follow-up that only appears after another answer, see conditional checkout fields with Pro. For the full editor reference, open field configuration documentation.